A Start
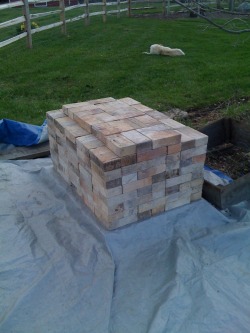
A pile of bricks, the first step in the process. These were used bricks for former wood drying kilns that have gone out of business. I have about 300 here, which is probably a bit too many, but I don't want to run out.
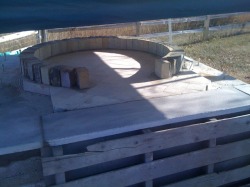
First course
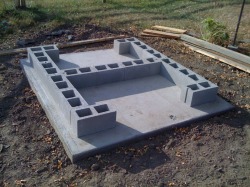
A concrete pad was laid down (approximately 7 x 8') and the first course of blocks set in place. The design will be a Pompeii dome style based on the plans from Forno Bravo (http://www.fornobravo.com/forum/) which is an excellent source for oven builders and users. The dome itself will be 42" in diameter (inside). The blocks here are forming the base for the dome. The plans call for one big storage area under the dome, but I have split it into two smaller ones with access front and back.
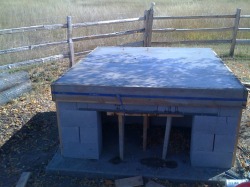
Blocks in place
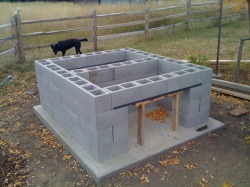
The final layout of the blocks. Angle iron along the front and back arches gives the openings structural integrity. They will be plastered over later.
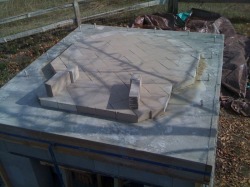
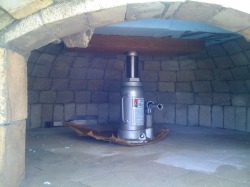
Preparing for the floor
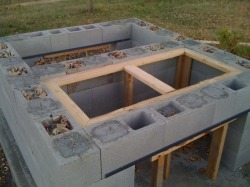
I have filled in every other block with concrete and iron rebar. I am also starting to frame in the middle portions. Plywood sheets will be laid down over these, and concrete poured on top to form a base for the dome.
Base pour
The base has been poured and leveled. It is 6" thick. I will leave the framing underneath it in place until spring. It has several iron rebar rods cris-crossed within it, so it will hold once it sets up.
Insulated concrete base
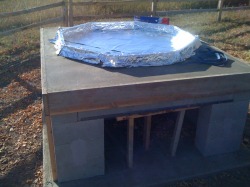
I built an octagonal frame where I'll pour an insulated concrete pad that will sit under the hearth floor. The insulting concrete is a mix of portland cement and perlite. I have used foil here to help reflect the heat, but I now think that was a waste of time since it corrodes quickly.
Finishing the floor

The insulating "perl-crete" was poured and the rest of the floor set up. That will be regular concrete with rebar.
The insulating concrete is necessary to keep the hearth floor warm. If it were not there, the floor would be sinking all it's heat into warming the base itself. While this will happen to some degree anyway, the idea is to limit heat loss so the oven will remain warm.
The insulating concrete is necessary to keep the hearth floor warm. If it were not there, the floor would be sinking all it's heat into warming the base itself. While this will happen to some degree anyway, the idea is to limit heat loss so the oven will remain warm.
Floor done and ready for brick
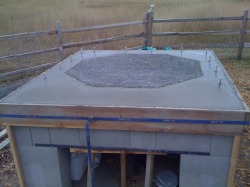
Both floor pours are done and ready to continue. I added bolts along the edge so I can later attach a housing around the dome.
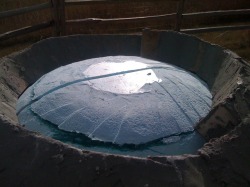
Finally, the hearth floor
The hearth floor is laid out in a herring bone pattern. I decided to use new fire brick for this part as I wanted a very smooth, even surface. The bricks are set on a loose layer of fireclay spread over the insulated concrete pad.
The dome walls start
The first "soldier" course starts. A fireclay-portland cement mortar is used to hold them in place.
Archway
Another layer and the beginnings of the entryway arch.
The indispensable tool
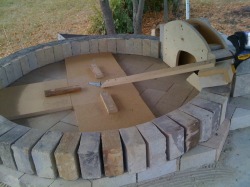
The bricks are aligned using a derrick like tool which pivots from the middle of the dome. A clamping system at the end of the arm holds the bricks at the right angle and position while mortar is applied. This process is repeated around the dome, layer by layer.
More layers
Closing up
Getting pretty high now.
The arm
An inside view of the arm.
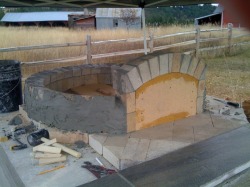
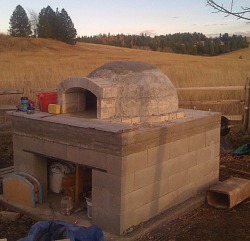
Shaping up
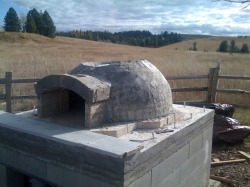
Pretty far along. The entryway arch and vent are completed. later, a chimney will go on top of the vent and a finishing course of red brick will complete the entryway arch.
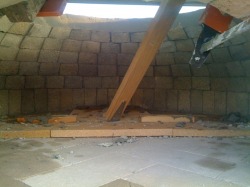
Time for a change
The arm tool was beginning to get to it's limits. The set angle for the bricks was too steep for them to hold well when the arm was moved away, so ... I carved a dome top from foam using a power planer. This will allow me to continue laying bricks over the dome top.
Under the foam
Inside under the foam dome top. The arm has been removed and the foam was jacked up into position.
Keystone
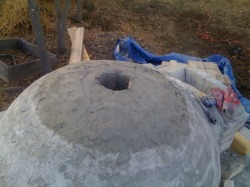
The foam top made for quick work of the remaining bricks. Only the last "keystone" left to fit.
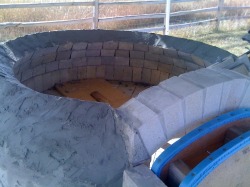
Done with that part!
Finally, the dome has been completed.
A dirty job
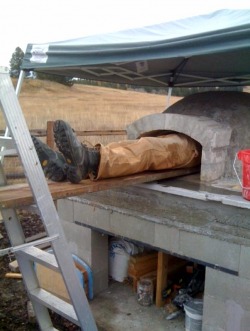
I needed to clean up the joints on the dome inside. Only one way to do that and it wasn't pretty. Not a job for those that are claustrophobic!
Winter!
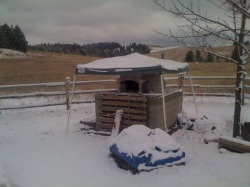
It was a race with winter snows to get the oven in a usable condition.
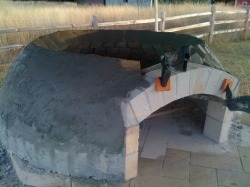
A warm blanket
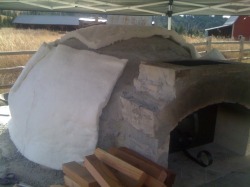
The dome is surrounded by a ceramic insulation blanket (3 layers). This helps keep the heat in after the fire has run its course.
Drying
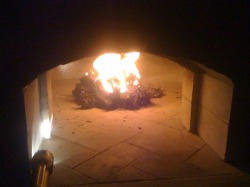
In the mean time, a series of small "curing" fires are set each day for a week or so. These start with just newspaper and gradually build up to a full fire. The idea is to drive all the water that was in the bricks and mortar out. As the week went on, the outside of the dome would visibly steam as the moisture left.
Full bore
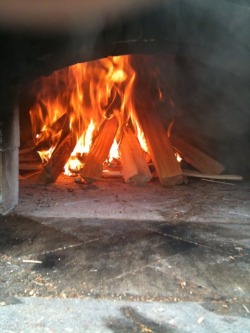
A full fire, or what is known as "a scary large fire". This can be intimidating until you get used to seeing it. It gets quite hot 700-1000 F)
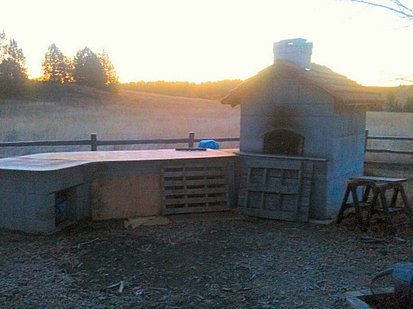
Not done ...
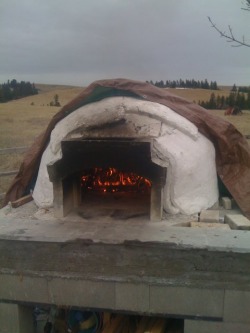
but usable. I have cooked in the oven quite a bit over the winter. I keep a tarp over it in between sessions to keep the insulation blanket dry. Now spring is coming and I have restarted the building, which means I can not use it for a while :-( I miss it already, but look forward to not having to mess with the tarp!
In the weeks to come, I will be adding a chimney, front arch, and a shed like housing around the dome. The whole thing needs to be stucco'd and I'd like some doors on the storage area underneath. I've come so far, but have a ways to go ....
I have already had to rebuild the entryway arch shown here. It developed bad cracks from mortaring during a freeze last fall. I've now made it much stouter and added a red brick outer archway. More pics soon.
There's smoke over thar ...
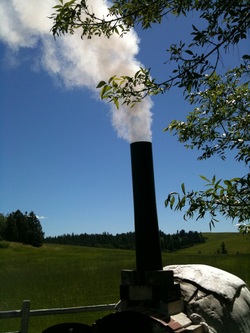
I had a vent welded up and added some stove pipe. Looks like a factory stack right now!
Next stage
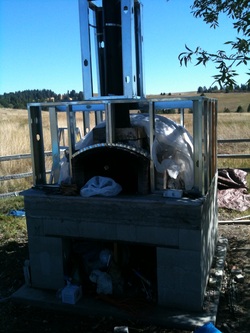
A bit of a break, but now building a frame around the dome.
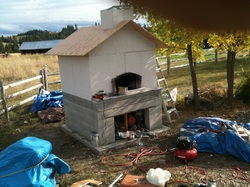
The cover up.
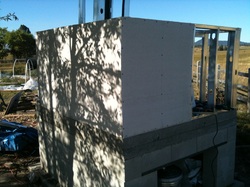
The frame is then covered with concrete board. A long process and heavy materials!
Roof!
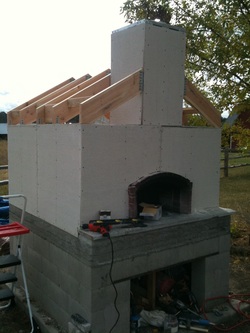
At long last, I am starting a roof by building gables. I can finally get rid of the dang tarp cover.
Almost there.
Some thick ply on top completes the structural part.
And Tile!
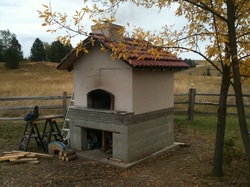
Through extraordinary luck, I found a local source of roof tile for that authentic look. The last bit will be to stucco and paint the whole thing.
And yet there's more ....
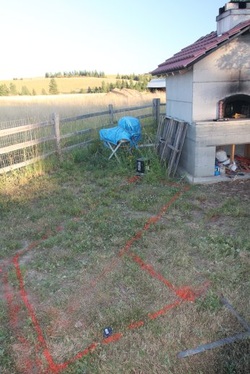
We wanted to add a "bar" to the oven so we can sit out here and enjoy. I marked it off. I then re-marked it off when Beth decided it needed a "bend" in the shape ......
After much sweat .....
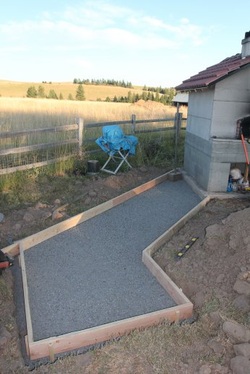
Many hours of digging by hand, and carting of gravel (Thanks Kara and Trevor!). Why do I always decide to start these things on the hottest day of the year when the ground is harder than the concrete I'm about to pour ...
Concrete poured!
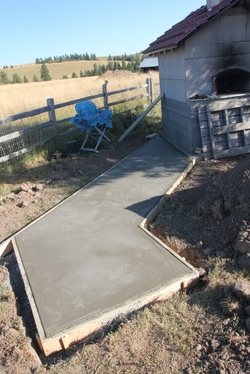
Again, much hauling of concrete bags and mixing. :-P
and the structure ....
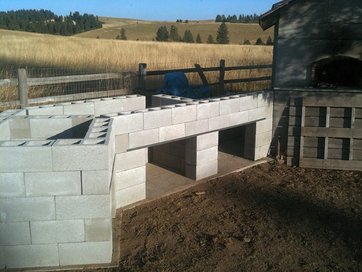
Like the oven base, the bar sits on a brick structure. These were eventually filled in with concrete. Ultimately, we'll get doors on the openings and have some storage too.
Winter's a comin' ....
Before the weather set in, I screwed down some plywood on top. It will keep the inside relatively clean and dry. It also gives me an idea of how big this sucker will be! Deary may have a new airport!