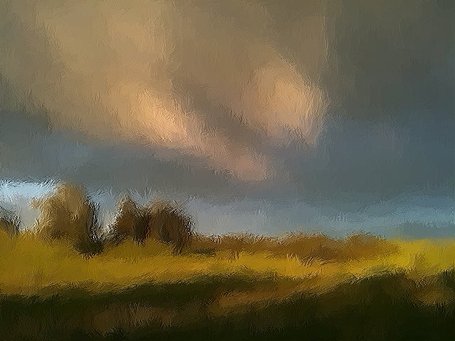
It is a beautiful day. I'm out walking (I can't quite remember where). The trees and fields are green, clouds are streaked across the sky. It is a nice enough view that I stop to look around. It's a good feeling being out here. ... Something bumps against my leg. I try to ignore it and continue taking in the view. It taps me again. "What is it!?" ... I look down, but I can't quite see what it ....
My eyes pop open. It's dark. Beth is sleeping soundly next to me in the quiet of the morning. Disappointed at the loss of my euphoria, I sigh feeling the dream fade and reality begin to creep back into my brain. Wendy is stretched out between us, twitching and running in a dream of her own. Her leg is rhythmically poking me in the calf. I nudge her to stop and then stretch out myself underneath the covers. She wakes up and props her head on Beth's leg, staring at me intently with quiet anticipation. It's dark, so I feel it more than see it. I avoid looking her in the eye as she will take that as a signal to start, and I'm not quite ready for that. But she knows. It is coming and she is simply doing what her instincts are programmed to do. Simply watch and wait. She knows what day it is. It's Sunday ... Baking Day.
Reluctantly, I eventually slip out of bed telling myself how nice it would be to stay there, warm and comfortable. But I know better. If I stayed, I would just toss back and forth thinking of all the things I could or should be doing. Wendy immediately leaps off the bed and noisily shakes the sleepiness off. I look back at Beth, but she is undisturbed.
Reluctantly, I eventually slip out of bed telling myself how nice it would be to stay there, warm and comfortable. But I know better. If I stayed, I would just toss back and forth thinking of all the things I could or should be doing. Wendy immediately leaps off the bed and noisily shakes the sleepiness off. I look back at Beth, but she is undisturbed.
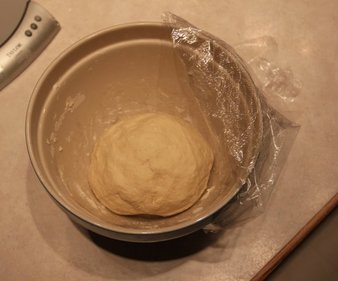
We venture into the kitchen where I turn on a light and start the tea kettle. I feed Wendy, which momentarily diverts her attention from the coming activities. On the counter is my bread starter. I began this process the night before by removing a small bit of saved dough from its hibernation in the fridge and feeding it some flour and water, increasing its amount by four. Now, after fermenting overnight, it is pressing against the clear plastic wrap over the bowl.
Starters like this are often referred to as sourdough, although mine has little of those qualities. More correctly it is called a wild yeast starter, one that I got going from scratch a couple of years ago by letting some flour and water sit out for a couple of weeks. It is pretty much all I use now for making bread. Instant dry yeasts also work well, but I find they ferment too quickly and can leave a yeasty flavor in the bread. The wild yeast starter is a bit more work and challenge, but that's just part of the game.
With my head starting to wake up, I set out to make the dough itself. Today is a bit unusual as I am making a larger batch (8 loaves) than I typically do. I will not be able to bake for a couple of weeks and I want some loaves to freeze. The rest I will pass out to friends and family. Because I can't mix up that much at once, I work in 4 smaller batches, one at a time (Beth hasn't quite seen the value of having a 50 lb industrial mixer in the kitchen ... yet). I start by weighing out flour and water and combining them in a small mixer. I also add chopped roasted potatoes (also made up the night before) to this mix. Keeping each batch separate, I allow them to sit for 30-60 minutes. It's a process called autolysing, and it allows the flour to fully hydrate and the gluten proteins to form. After all the mixing, I get my tea and pop back into bed to warm up and doze a bit. Wendy grudgingly jumps back up between us, disappointed at the temporary pause in activity.
With my head starting to wake up, I set out to make the dough itself. Today is a bit unusual as I am making a larger batch (8 loaves) than I typically do. I will not be able to bake for a couple of weeks and I want some loaves to freeze. The rest I will pass out to friends and family. Because I can't mix up that much at once, I work in 4 smaller batches, one at a time (Beth hasn't quite seen the value of having a 50 lb industrial mixer in the kitchen ... yet). I start by weighing out flour and water and combining them in a small mixer. I also add chopped roasted potatoes (also made up the night before) to this mix. Keeping each batch separate, I allow them to sit for 30-60 minutes. It's a process called autolysing, and it allows the flour to fully hydrate and the gluten proteins to form. After all the mixing, I get my tea and pop back into bed to warm up and doze a bit. Wendy grudgingly jumps back up between us, disappointed at the temporary pause in activity.
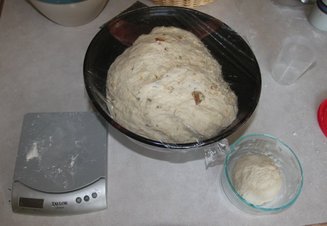
Having finished the tea and waited through the pause, I head back into the kitchen. It is light out now, although the sun hasn't come out yet. I take the starter out of its bowl and knead it a bit. It is then weighed out into four 8 oz pieces + one 4 oz piece. This last bit is mixed with a small amount of flour and water and then put back into its container to store in the fridge for next time. The remaining pieces are for the bread. I cut each one into several smaller pieces and add them to the batches of dough along with some salt. That's it. No sugars are necessary in these breads as they are long fermenting. After running each batch through the mixer, I finally combine all of them into one big dough ball which is then kneaded and left covered in a large bowl.
"Morning." Beth is emerging from the bedroom, still foggy with sleep and focused on making her morning cup of coffee. "Ummm Hmmm", I mutter back. Wendy greets her like a long lost friend, grinning as her whole body wags in concert with her tail. Her shiny black fur is splattered with white flour spots now, having supervised my mixing operation from below. I set my timer for 50 minutes and turn to making a bite to eat and another cup of tea.
"Morning." Beth is emerging from the bedroom, still foggy with sleep and focused on making her morning cup of coffee. "Ummm Hmmm", I mutter back. Wendy greets her like a long lost friend, grinning as her whole body wags in concert with her tail. Her shiny black fur is splattered with white flour spots now, having supervised my mixing operation from below. I set my timer for 50 minutes and turn to making a bite to eat and another cup of tea.
After perusing the better bits of our local paper and enjoying a light breakfast, the timer on my cell phone goes off. Wendy is, of course, tuned into that, and jumps up from her spot on the floor ready to go. I head over to the counter where I take the fermenting dough from its bowl and stretch it out and fold it onto itself three to four times. Then I return it to the bowl and reset the timer for another 50 minutes. We will go through this routine two more times before forming the loaves.
Timing is everything. That phrase is particularly true for baking in the wood oven. In a conventional electric or gas oven, the temperature is maintained by continually turning the heat source on or off. The oven stays at whatever temperature you have selected. In contrast, a wood oven is initially heated to a very high temperature and then allowed to slowly cool down. Along the way, when the oven hits an optimal temperature for, say, baking, we cook. To work correctly, the oven must be at a good baking temperature at the same time that the bread dough has risen to an optimal point for baking. If the dough is ready too soon, the oven will be too hot. If it is too slow, the oven will be too cool. Some leeway is present, i.e. a fast dough can be refrigerated or a cooling oven can be slowed with an oven door, but in general, the timing is everything and this is the real challenge of wood oven cooking. Through trial and error, I have come to a reasonable routine for most of my breads.
Because of that, I know that after the third and final fold, it is time to setup the oven. Wendy and I head out back. I lay out an old shipping pallet and open the heavy iron door on the oven. Inside is wood. I usually put a full load of wood in the oven after each bake. This ensures that I have a nice dry set of wood to fire each time I bake. The downside is that I now have to unload the oven before I get started. Hence, I am out here early. I crouch over and lean into the oven and start removing pieces of wood. The inside is dark and the opening is sooty. No matter how hard I try, I inevitably end up with soot somewhere on me, usually on the top of my head. I will, I know, hear about this eventually, so I grumble as I feel my shoulders or head bump the side.
I stack the dried wood on the pallet and select a few clean grained pieces to split into kindling. These I use to build a layered stack in the middle of the oven floor. Around this I lean bigger pieces, making a firewood pyramid. The whole thing is then left to wait as it is too early to fire yet. Wendy, who has been aimlessly wandering around the oven during all this boring work, is waiting for me to finish. Now done, I take a spare piece of kindling and throw it for her a few times until she crunches it into oblivion. I take a few moments to poke around in the garden seeing what's up and then watch the bees for a while. Back inside, I clean up and Wendy and I wait for the next timer to go off. While I'm waiting, I go into the back bedroom and get the oven tools out. These consist of a rake, broom, shovel and peel. I also have an old mop and a pump sprayer that I bring along. The aluminum tools clank loudly against each other as I wind my way around Beth, who is busy doing real work sorting out the laundry. Oblivious to all of this, Wendy bursts through both our legs, nearly knocking us over as she rushes to be the first out the door.
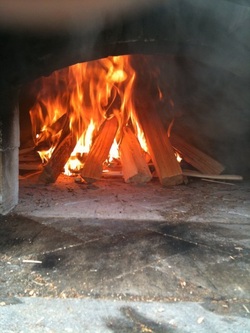
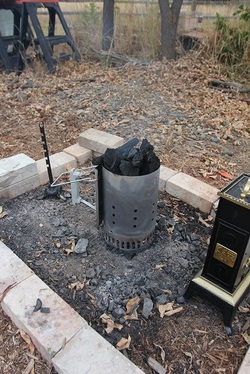
Finally the timer sounds. I remove the big dough ball, now puffy and airy, from the bowl. I weigh it into eight even pieces which I line up and cover on the kitchen island. I reset the timer for 15 minutes and, once again, head to the yard with my four legged escort. The big moment is here! Time to Fire! I use a small propane torch. Click, click, click, Poof! The torch burner ignites and gives off a light roar. I aim it at the bottom of my firewood pyramid. Smokey flames begin to lick up through the pile. Soon the oven is full of smoke which begins to pour out the chimney. The wood snaps and crackles as the fire comes to life. I throw another couple of wood pieces on the pile and stand back. Initially, the fire is pretty smoky, but once the oven heats up, it will burn very clean. Flames are now curving out of the oven chamber and racing up the chimney. I gently poke at the fire with the long handled rake. Satisfied that the fire is on its way, I head back inside as the timer goes off again.
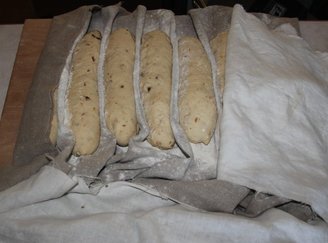
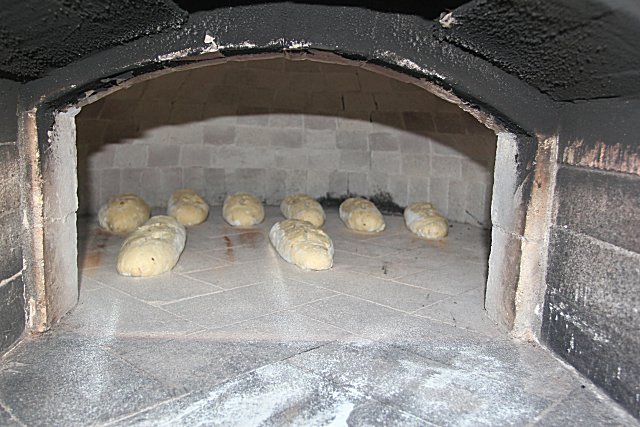
I place a large board on the kitchen island and cover it with a couche which is a piece of raw flax linen. This heavy brown cloth is traditionally used in baking because the oily fibers do not stick well to the bread dough. I sprinkle flour over the couche and then grab the first piece of dough. Using a set pattern of motions, I form out a loaf. This loaf is called a batard, the typical longish "French bread" type shape you find in the store. It is fairly simple and doesn't take the skill of the longer, thinner baguette, which I am still trying to master. We could make larger ball or dome shaped loaves (boules) today too, but I'm after more of a sandwich bread, and the batard works well for that. After making the first elongated football shape, I set it in between folds of the couche and begin on the next. Soon, all eight loaves are formed and lined up in their folds. The timer is set for an hour and 15 minutes. Again, trial and error tells me this is about right.
After covering these, I return to the yard to tend to the fire. The smoke has died down a bit and the inside of the oven is blackened with soot. I put more wood on and get it roaring again. Wendy and I head over to the wood storage pile and I pull the tarp off. She pokes in and out of the pile, snorting wildly at the hint of a mouse or vole. Nothing "good" pops out for her this time, but she continues to search. I start splitting some larger logs down into smaller pieces. These will go into the oven later to prepare for next time. Even though all the wood has been dried out and seasoned for a long time, it still tends to retain some moisture in our climate.
By now, it is almost noon. I'm hot and sweaty from splitting wood, so we head in for some lunch and a cool drink. It's usually about now, after sitting down on the couch with a quick sandwich and beer, that I realize I had soot on my back which is now smudged on the couch. Opps! Better clean that off before Beth sees! :-)
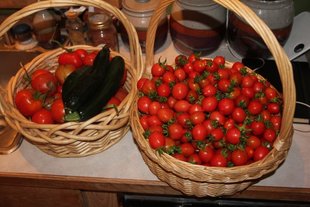
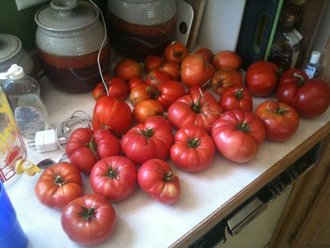
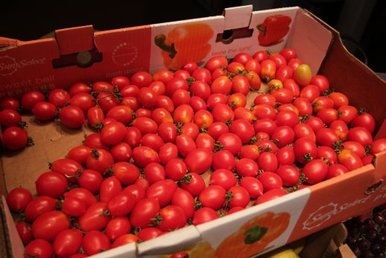
Lunch taken care of, we check the fire again. After 50 minutes or so, I begin to get cautious about adding more wood. I need the fire to be mostly ash by the time the timer goes off. I spread the coals out a bit. The black sooty inside of the oven has started to turn white. This is what I am looking for. It means the soot has burned off and the oven is coming up to temperature. It should be completely white by the time the fire is done. I throw a couple of smaller pieces of wood on, grab a chair, and enjoy the afternoon. My mind, as usual, begins to think about what to have for dinner. A roast would be nice. And some of those dang tomatoes and veggies from the garden. I mentally take stock of what that will require as I finish up my lunchtime beer.
By now, it is almost noon. I'm hot and sweaty from splitting wood, so we head in for some lunch and a cool drink. It's usually about now, after sitting down on the couch with a quick sandwich and beer, that I realize I had soot on my back which is now smudged on the couch. Opps! Better clean that off before Beth sees! :-)
Lunch taken care of, we check the fire again. After 50 minutes or so, I begin to get cautious about adding more wood. I need the fire to be mostly ash by the time the timer goes off. I spread the coals out a bit. The black sooty inside of the oven has started to turn white. This is what I am looking for. It means the soot has burned off and the oven is coming up to temperature. It should be completely white by the time the fire is done. I throw a couple of smaller pieces of wood on, grab a chair, and enjoy the afternoon. My mind, as usual, begins to think about what to have for dinner. A roast would be nice. And some of those dang tomatoes and veggies from the garden. I mentally take stock of what that will require as I finish up my lunchtime beer.
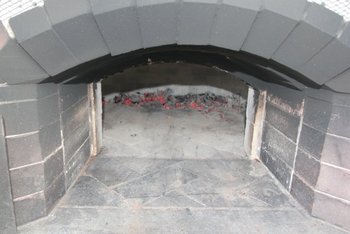
By now, the oven walls are completely white. Most of the wood has burned down. When the timer goes off, I begin removing the ashes and remaining coals from the oven. Bread baking is usually done sans fire. Other items such as flatbreads, pitas or pizzas require higher temperatures and are cooked with a small fire next to them, but this time, I will be using an emptied oven. With the fire died down, I brush out the ashes and sweep the oven floor. Finally, I use a wet mop to wash the surface. The floor hisses loudly with each sweep of the mop and Wendy jumps back as I draw the steaming mop head out of the oven to rewet it.
I check the temperature. It is pretty high - about 700* F. We will need about 500 for the bread, so I leave the oven door off and wait. I still have 45 minutes of rising time left and that will be about right. I move the wood I split earlier across the yard, closer to the oven. Occasionally, I check on the oven again. The temp is dropping nicely and I should hit my mark on cue with the dough.
I check the temperature. It is pretty high - about 700* F. We will need about 500 for the bread, so I leave the oven door off and wait. I still have 45 minutes of rising time left and that will be about right. I move the wood I split earlier across the yard, closer to the oven. Occasionally, I check on the oven again. The temp is dropping nicely and I should hit my mark on cue with the dough.
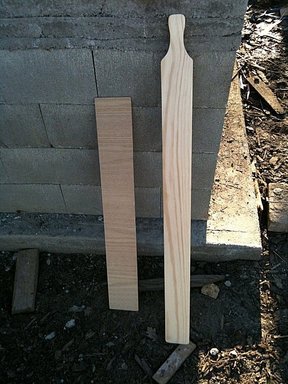
Back inside, I gather up more implements that I'll need. A long launching peel, and a turning board for moving the loaves from the couche to the peel. I also grab a lame which is a small stick capped off with a razor blade on one end. It will be used to slash the loaves. Lastly, I bring out a bag of brown rice flour to put on the peel underneath the loaves. It works well for sliding the loaves off the peel and does not burn in a hot oven like wheat flour.
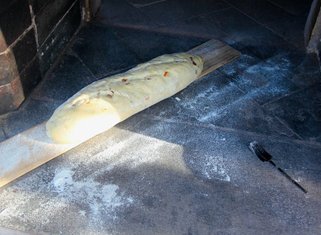
Finally, after all the prep since early this morning, the dough loaves are ready, the thermometer says the oven is at temp, Wendy is cued up outside, and I've carried the heavy board with its doughy load out to the oven. Using a movement that I've learned with a few dropped loaves here and there, I quickly swipe each loaf off the couche with the turning board and place them on the long peel. I can fit two at a time on the peel. Once in place, I slash them along the length of the loaf three to four times and then quickly, with a jerking motion, place them in the oven towards the back. After three more rounds of loading, I pump up the garden sprayer and mist the inside roof of the oven. This helps steam the loaves, making them expand and rise better. Then the door goes on and, you guessed it, the timer is reset. Thirty minutes this time. Time enough, I'd say, for another beer!
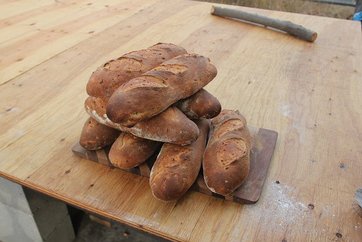
After a few peeks at the baking loaves, I decide to pull them out a few minutes early. Better than burnt bread! I've learned to let them go longer than my first impressions suggest, however, as the good bread flavors actually come from a nicely caramelized crust, not the inside crumb. Technically, I should check the internal temperature, but I usually just eyeball it. The final stack looks good. Wendy follows, behind me, nose in the air, as I balance the goods while walking back inside. Once safely there, they cool on a rack to be bagged later.
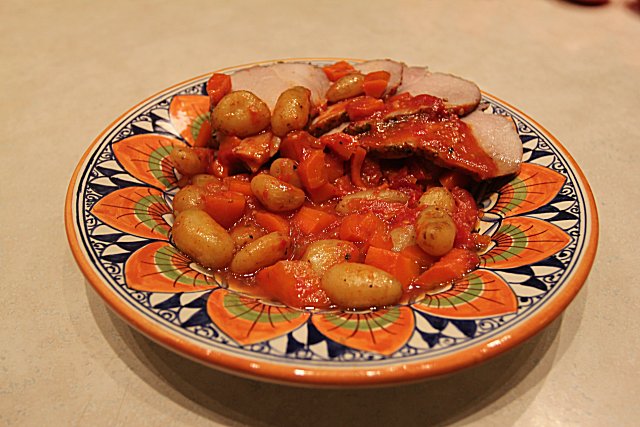
Meanwhile, the oven door has been replaced and I start collecting the tools to put away. The oven is about 400* now and I want to retain its heat for dinner later. Towards that end, I have defrosted a small pork roast. With the bread done and the clutter cleaned up, I head to the garden and dig up and clean some carrots and small fingerling potatoes.

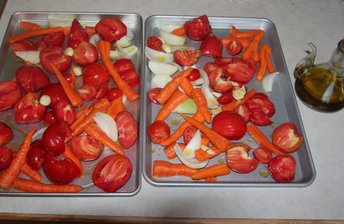
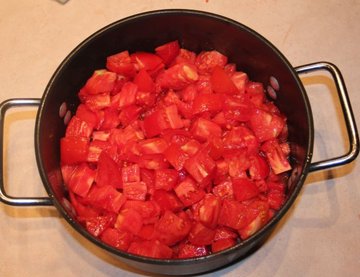
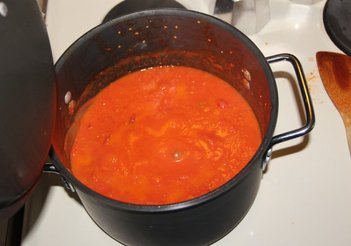
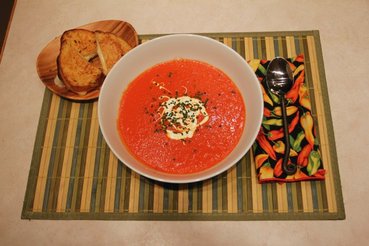
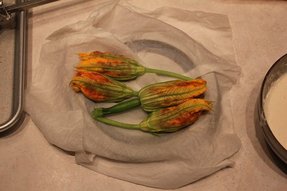
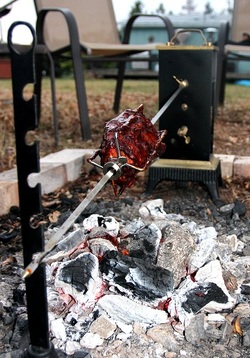
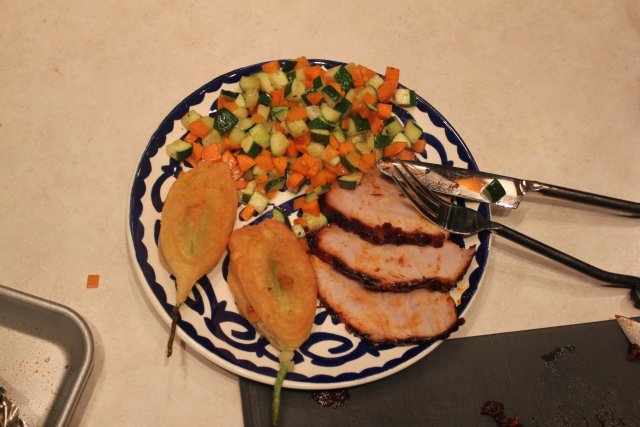
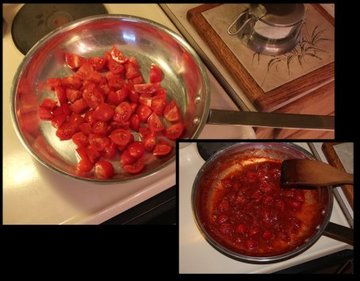
This is one of the fun things about the wood oven. People often call it "the pizza oven" or "the bread oven", but in reality, it's just an "oven" and we can cook about anything in it. So, a few hours after the bread has come out, I find myself back outside with a new set of cooking accoutrements. This time we have a heavy baking pan and a container of quartered carrots, some small potatoes, and five large whole tomatoes. A couple of crushed garlic cloves are there too, all tossed with olive oil, salt and pepper. I put the pan in the hot oven for a few minutes. It is still running about 400*. Once the pan is good and hot, I pull it to the door and dump the carrots and potatoes in. These I stir and let brown a bit, then I add the roast, turning it often to brown it as well. After this prep, I center the roast on the veggies and place the tomatoes around it. One tomato I crush and drip over the roast. The whole thing is then scooted to the middle of the oven and I put the door back on. An hour or so later, we have a wonderful, hearty meal. The tomatoes melt down (the skins are easily removed after cooking) and the carrots and potatoes thicken up the juices making a rich, almost stew like mix.
Later that night, Beth and I are laying in bed, tired from the days activities, remembering that good meal. Wendy jumps up and plops down between us at our feet. We all sigh at the same time, as if we are all ready to give into the night and our dreams again. My eyes are getting heavy. I try to resist it, but already my companions have made the transition to sleep. I turn out the light. Soon, I too, return to that place of green fields and cloud streaked skies.
But wait! There's more! If you act now, we'll provide you a second meal, at absolutely no cost!
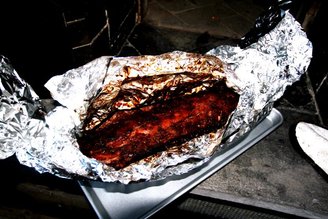
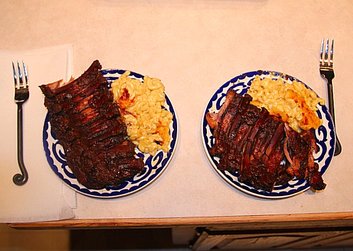
Before heading off to work the next morning, I wrap up some ribs in foil and put them in the oven. It is still running about 200*, so they will get a nice long, slow cook. Before wrapping them up, I coated them with some blackberry BBQ sauce we made from Kara's summer harvest. Later that night, after a tiring day at work, the ribs are ready.
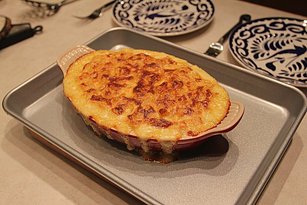
I also made up some mac and cheese (baked inside) to go with. A bonus meal! That little stack of wood provided three bakes, two meals, and a few leftovers. Not too bad. Finally, after two days of cooking, I relent and reload the oven with fresh wood, preparing for next time.


 RSS Feed